Step 1. Review & Prepare the Database for NavUserPassword.
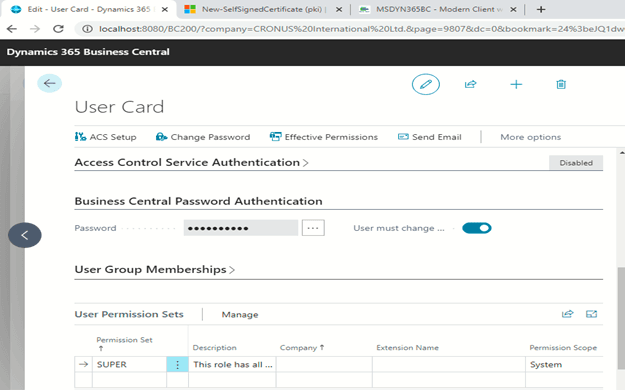
Add a User in database with Username and Password and give full permission.
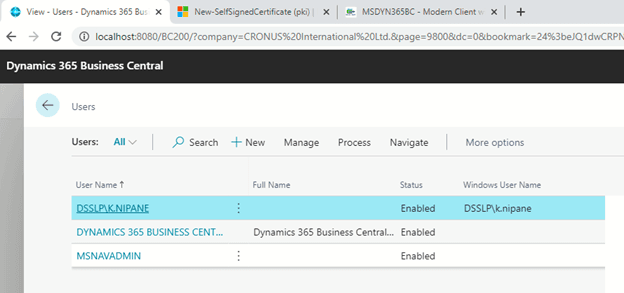
Create a User in Navision. For Demo I am using – Username – MSNAVADMIN Password – Password@1357
Another way to create new user using command. Below command will running on Business Central Administration Shell run as Administration.
– Import-NAVServerLicense -ServerInstance BC210 -LicenseFile “F:\DSS-Abdul\License\BC 21 LICENSE\BC21.flf” //import Licenses File.
-New-NAVServerUser BC210 -UserName BCADMIN -Password (Read-Host “Direct2s” -AsSecureString)
-Set-NAVServerUser BC210 -UserName BCADMIN -Password (Read-Host “Direct2s” -AsSecureString)
-New-NAVServerUserPermissionSet -UserName BCADMIN
Restart Business central server instance.
Step 2. Generate and check SSL certificate
If you have not certificate, need to generate certificate then do below step: –
Download GenerateSSCertificate.ps1 tool in your system.
The below command will run on Business Central Administration Shell run as Administration.
Set-ExecutionPolicy Unrestricted -Force
Import-Module ‘C:\Users\Public\Downloads\GenerateSSCertificate.ps1’
New-SelfSignedCertificateEx –Subject “CN=dss-329” –IsCA $true –Exportable –StoreLocation LocalMachine
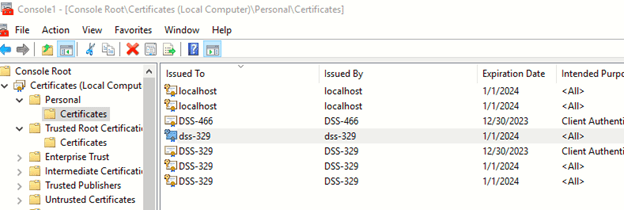
After executing the script go running MMC command and check the certificate is installed correctly.
Step 3. Update the certificate Permission to the Service Account.
1.Open the mmc.exe.
2. Go to the File menu, and then choose Add/Remove Snap-in…
3. Select Certificates.
4. Choose Add.
5. Select the computer account.
6. Choose Finish and then OK.

Step 4: – Select the certificate under Personal Certification, right-click and choose All Task and Then Choose Manage Private Keys.

NOTE: If you have already a certificate then directly go to MMC and check the certificate in the console and add a user with full permission.
Add New Account, Select Account which is used for Running Service and Set Full Control to Service.

Optional –
Step 7:- If your Dynamics NAV Service Account and Web Server are different then you need to Export the Certificate and import in Web Server Server.

Note: It-Mandatory to copy the same certificate in the Personal as well as the Trusted Root Certificate folder.
Step 5:- Update Service Tier.
below steps for the Business Central 20 version.
1. Certificate Thumbprint – From the Certificate that we created in above Step 3(7).
2. Credential Type – NavUserPassword
3. Stop and Start the Service.

Update Web Server Configuration File.
Below are steps for the Business Central 21 version
The below command will be running on Business Central Administration Shell run as Administration.
ECFA6868127903C82131043932BE476C54961B0D -Thumbprint
- Set-NAVServerConfiguration -ServerInstance BC210 -KeyName ServicesCertificateThumbprint –KeyValue ECFA6868127903C82131043932BE476C54961B0D
- Set-NAVServerConfiguration -ServerInstance BC210 -KeyName ClientServicesCredentialType -KeyValue NavUserPassword
- Set-NAVServerConfiguration -ServerInstance BC210 -KeyName ServicesCertificateValidationEnabled –KeyValue false
- Set-NAVServerConfiguration -ServerInstance BC210 -KeyName ClientServicesSSLEnabled –KeyValue true
- Set-NAVServerConfiguration -ServerInstance BC210 -KeyName SOAPServicesSSLEnabled -KeyValue true
- Set-NAVServerConfiguration -ServerInstance BC210 -KeyName ODataServicesSSLEnabled -KeyValue true
- Restart-NAVServerInstance -ServerInstance BC210
Step 6: Add the user and give full permission
1. Open IIS Manager.
2. click on Site -> Microsoft Dynamic 365 Business central web client -> Web server instance and right-click on web server instance Choose Explorer.
3. Filter Folder with Type = Json.


* Open navsettings.json and update the following parameter – ClientServicesCredentialType to NAVUserPassword.
Step 7:- Binding SSL certificate with Web services API(SOAP and OData URL)
Do the below command in Command Prompt as Administrator
- netsh http delete urlacl url=http://+:7818/BC190/
- netsh http add urlacl url=https://hostname:port/navserver user=DOMAIN\user
- netsh http add urlacl url=https://vm-nav-gis.dsslp.com:7818/BC190 user=navu1
- netsh http delete ssl ipport=0.0.0.0:7818
- netsh http add sslcert ipport=ipaddress:port certhash=thumbprint appid={id}
- netsh http add sslcert ipport=0.0.0.0:7818 certhash=3D203F050DB9AC5C727C6C2680E2D9C5CE6B64FC appid={00112233-4455-6677-8899-AABBCCDDEEFF}
Same as the below image.

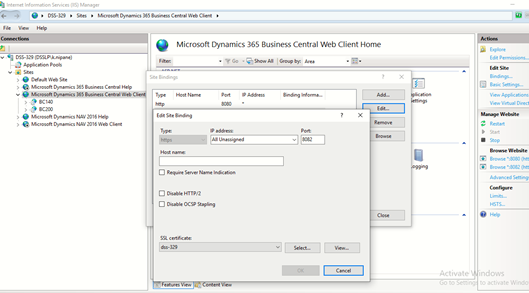
Step 11:- Update Web server and Map SSL Certificate With Website for Modern Client.
1. Open IIS Manager.
2. Select Microsoft Dynamics 365 Business Central Web Client.
3. From Right Hand Panel Select Binding and create a Binding for HTTPS using the certificate you added in Step 1, as shown below.

Stop and Start the Web Server Instance. Restart NAV Service and Try again to Open Modern Client.
Web Client is working with username and password which was created in the first step.
Note: – If not able to open web services
Then do the below steps: –
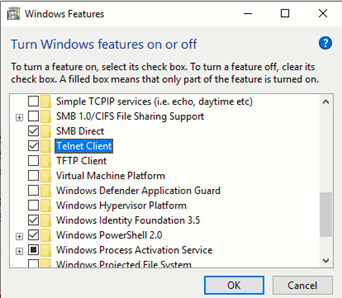
- Enable Telnet client.
Go to Control Panel ->Programs->Programs and feature->click on Turn Windows feature on or off. -> enable Telnet client.
Run the below command in the command prompt as Administrator
telnet IP Address Port
for example, – telnet 123.45.67.89 1521
Reference link: – https://ksdconsultancy.blog/2015/08/09/configuring-web-services-to-use-ssl-soap-and-odata/
About the author:
Kranti Nipane – Technical Consultant
Kranti Nipane is a technical consultant with experience in Microsoft Dynamics 365 Business Central and Microsoft NAV.